Convert My Bike To Electric, As the world increasingly embraces eco-friendly transportation, many cyclists are looking for ways to upgrade their traditional bicycles to electric bikes (e-bikes). The process of converting a standard bike into an electric bike can be rewarding and cost-effective, offering an environmentally friendly alternative to driving while still giving you the thrill of cycling. If you’re wondering how to “convert my bike to electric,” you’re in the right place! This guide will walk you through everything you need to know about transforming your bike into an e-bike.
Why Convert My Bike to Electric?
Before diving into the conversion process, it’s important to understand why many cyclists are making the switch to electric bikes:
- Environmental Benefits: Electric bikes are a greener mode of transportation compared to cars. They emit less carbon dioxide and help reduce air pollution.
- Cost Savings: Converting your existing bike can be more affordable than purchasing a brand-new electric bike, making it an attractive option for those on a budget.
- Increased Range and Speed: An electric conversion allows you to cover longer distances and ride faster, making commuting or long-distance trips much easier.
- Health Benefits: With the assistance of a motor, you’ll still be getting exercise, but without the physical strain. It’s a great way to keep cycling while reducing the impact on your joints.
Key Components for Converting Your Bike
To convert your regular bike into an electric one, you’ll need a few key components. These parts come in conversion kits, but understanding their role will help you choose the right one.
- Motor: The heart of the electric conversion. Motors typically range from 250W to 750W in power. A higher wattage motor offers more speed and torque, while a lower wattage motor is ideal for flatter terrain.
- Battery: The battery provides the power for the motor. The size of the battery (measured in amp-hours, or Ah) will determine how far you can go on a single charge. A 36V or 48V battery is commonly used for conversions.
- Controller: This is the electronic component that manages the power going to the motor. It communicates between the motor, battery, and throttle, making sure everything works efficiently.
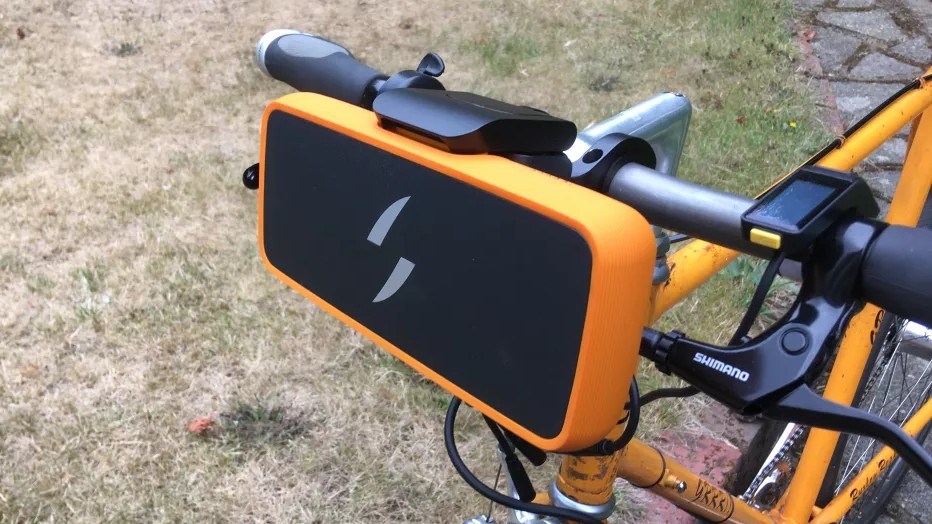
- Throttle and Display: The throttle controls the speed of your e-bike, while the display shows vital information such as speed, battery level, and range.
- Wheel and Hub Motor: Many e-bike conversion kits use hub motors that are built into the wheel. This makes installation much easier since you don’t have to mess with the drivetrain.
Step-by-Step Guide to Convert Your Bike to Electric
1. Choose the Right Conversion Kit
There are numerous conversion kits available in the market, each designed for different types of bikes. Consider the type of bike you have (mountain, road, hybrid, etc.), the terrain you’ll be riding on, and the level of assistance you want. Kits typically come with all the necessary parts for installation, including the motor, battery, controller, and cables.
2. Install the Motor
Depending on the kit, the motor will either be placed in the hub of your front or rear wheel. If you’re using a hub motor, you’ll need to remove the existing wheel and replace it with the motorized one. Make sure to properly secure the motor to prevent any wobbling or shifting during use.
3. Attach the Battery
The battery is usually mounted on the frame, either on the downtube or rear rack. Choose a spot that is easily accessible for charging but doesn’t interfere with your balance or handling. Ensure that the battery is securely fastened and connected to the motor.
4. Install the Controller
The controller is the device that connects the battery and motor. Mount it in a location that’s easy to access, such as the frame or underneath the seat. Wire it to the motor and battery, following the instructions provided with your kit.
5. Set Up the Throttle and Display
Once the controller is in place, you can install the throttle on the handlebar. The display can be attached to the handlebar as well, and it will show key information such as battery status, speed, and distance traveled.
6. Wiring and Final Setup
Ensure all the wiring is correctly connected. Double-check that the motor, battery, controller, and throttle are all functional before taking the bike out for a test ride.
7. Test Ride
Once everything is in place, take your converted bike for a test ride. Start slow and get familiar with how the motor responds to throttle input. Check that the motor provides smooth acceleration and that the brakes are working properly.
Tips for a Successful Conversion
- Compatibility: Ensure that the motor and battery are compatible with your bike. Some bikes, like those with disc brakes or a full suspension frame, may need specialized kits.
- Power Requirements: For hilly areas or long commutes, consider a high-wattage motor (500W or more) and a larger battery (10Ah or higher) for better performance.
- Legal Restrictions: In some regions, there are laws regarding the maximum speed and power of e-bikes. Check local regulations before hitting the road.
- Safety: Always wear a helmet when riding your electric bike and ensure that your bike is equipped with quality brakes, especially if you’ve increased the power of the motor.
Conclusion
Converting your bike to electric is an excellent way to enjoy the benefits of e-biking without the high cost of a brand-new e-bike. With the right tools and components, you can easily transform your regular bike into an electric one. Not only will this give you a more efficient and enjoyable way to commute, but it will also contribute to a greener planet.
If you’re still asking, “how can I convert my bike to electric?” the answer is simple—get a conversion kit, follow the installation steps, and enjoy the ride!
You Might Also Like These: